Add Lasers and Sound Effects
To "Jet Fighter" - Video Tutorial
Final Cut Pro
In Preparation:
View the Model “Add Laser & Sound Effects” video on the class website. This is what you will be recreating. (Mobile) (YouTube)
Step #1:Retrieve the laser images and sound effects from the RLS Multimedia Server. Place folder on your desktop. (Mobile) (YouTube)
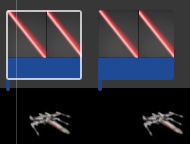
Step #2: Add Lasers - Animation.
Add a minimum of 5 lasers to Each jet fighter. (Mobile) (YouTube)
Here are the 9 steps you will follow in order to create an animation:
- Select Clip
- Transform Image
- Note: This tutorial will teach you how to change the size (Transform!) of a laser. Remember to use this skill to change the size of objects in your future Star Wars scenes (eg. R2D2).
- Slide the Playhead to the beginning of the clip
- Drag the image to the end point
- Select Keyframe
- Drag the image to the start point
- Drag the playhead to the end of the clip - click on the left arrow on the keyboard once so you see the laser
- Drag the image to the end point once again...you should see a red line
- Select Done!
Add a laser sound effect to each of the lasers you created. (Mobile) (YouTube)
You must add background music to the entirety of your film - You have been given music tracks. Also, when someone is speaking you must turn down the volume so that it is easier to hear the speaker. (Mobile) (YouTube)
When you direct and produce your Star Wars Scenes, you will be responsible for finding a background image that will replace the green screen in your video (just like the cockpit behind the girl in these training videos). This video will show you how to quickly find a background image. (Mobile) (YouTube)