Developing Your New Skills – “Peg, Cube & Sphere” (40 pts.)
Students will develop their CAD skills by successfully attaching a Cube to a Sphere with a peg. The peg sits in a hole that was formed in both shapes. This skill is the basis for the car that the students will soon create. Grade Sheet
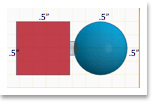
- Create a Cube: H: .5” x W: .5 x L: .5”
- Create a Sphere: H: .5” x W: .5 x L: .5”
- Create a peg that can slide in one side of each of these geometric shapes, but not out the opposite side. The two shapes should be able to touch when the peg is inside of them. 4. Create a Peg: H: .175” x W: .175” x L: .85”
- Create a Hole: H: .2” x W: .2” x L: .9”
Step-by-Step Video Tutorials:
- Model: Cube_Peg_Sphere (Mobile) (YouTube)
- New Project Set Up: MM or Inches & Change setting to allow micro movements (1/64 inches or .1mm) (Mobile) (YouTube)
- Create Cube (Mobile) (YouTube)
- Viewing the 3D object.
- Change the size of the Cube.
- Rule #1: Must "Set the Plane" AND be in a "Direct View" of the object in order to make changes to the it. Also, "Turn Off Shadow Button" & "Center & Zoom Button"
- Create Sphere (Mobile) (YouTube)
- Remember...you must "Set the Plane" AND be in a "Direct View" of the object in order to make changes to the it. Also, "Turn Off Shadow Button" & "Center & Zoom Button"
- 4b.Trick: How do you set a plane when all surfaces are curved? (Mobile) (YouTube)
- Create Hole (Mobile) (YouTube)
- Create Peg (Mobile) (YouTube)
- Ungroup.